
.jpeg)
.png)
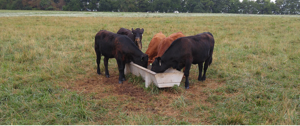
As commercial cow-calf producers drive through their pastures evaluating their spring calf crop and contemplating which heifer calves will make the short list of future herd replacements, now is the time to think about genetic testing. Genetic testing is a practical, proven tool that provides dependable genetic predictions and actionable insights about individual animal performance. In situations where resources are limited or herd inventories need to be tightly managed, information from genetic testing can be used to confidently confirm pasture observations and to inform and validate selection, breeding and marketing decisions.
As a genetics sales representative with Zoetis Beef Genetics, Kori Soutter guides customers in the step-by-step process of genetic testing their cattle and sends producers the sampling equipment they need.
“While working with customers, I’ve learned that collecting tissue samples to submit for genetic testing is half the battle, and a critical first step toward unlocking powerful insights,” Soutter said.
Whether producers are ready to jump into genetic testing with two feet, or still exploring the possibilities, Soutter explained that it’s never too soon to collect tissue samples and offers five key considerations for simplifying genetic testing sample collection and submission.
Keep sampling supplies at the ready. Having the necessary supplies on hand to collect tissue samples enables producers to grab samples when they’re handling cattle. For cow-calf operations, the best times are at birth, weaning, while vaccinating or during branding season. Order tissue sampling units and applicators now so the supplies will be ready next time the cattle is worked.
Know what a successful sample looks like. The best way to take a tissue sample is to collect the sample from inside the hairline, about an inch from the edge of the animal’s ear. Simply squeeze the applicator and take the sample. After collecting the sample, be sure there is tissue in the vial and the vial is closed. That will help visualize if a successful sample was collected.
Match the tissue sample unit barcode with the animal ID for each sample. Each tissue sample unit comes with a unique barcode. For each sample collected, write down the ID of the animal sampled to match the sample barcode. That information must be included on the order submission form -- in addition to gender, breed and an estimated birthdate -- in order for the samples to go through the lab successfully.
Store samples in a cool dry place. After samples are collected, producers do not have to put them in the refrigerator or freezer. Simply store the samples in a cool dry place after collecting them. Putting all the animal data in the order form could take a little bit of extra time and it may be a few days before they can be shipped back to the lab. A critical point is to ensure none of the tissue sample unit vials are cracked or leaking.
Prepare samples for shipping. One of the most common questions customers ask is, “How do I send in my samples?” Soutter recommends putting the samples in a sealed plastic bag, placing them in a box and padding the samples with tissue paper or paper towels to protect them from extra movement during transport. Don’t forget to place the completed order form on top of the samples inside the shipping box and always ask for a tracking number.
Regardless of operation size or goals, producers can implement genetic testing to help build an efficient and profitable herd by using genetic testing insights to speed up genetic progress for future calf crops. Having the tools on hand to genetic test is the first step in making better breeding and selection decisions to build a better herd. Visit BeefGenetics.com for more information.
Be the first to know
Get local news delivered to your inbox!


.png)
